Archive Creation, Edition, Multi-Version Pages, and Auto-Archive Jobs
This chapter explains the full archive lifecycle: how to create and manage archives, when to refresh versus create a new version, how to build a dated version history for change evidence, and how to automate ongoing captures with auto-archive scheduling.
|
Plan-gated features in Pemarks are enforced in both the UI and the backend. When this guide says a feature needs a specific plan, that is based on the actual entitlement logic in |
|
Feature availability by plan:
Archive quota counts archived pages (including all versions), not the number of archive entries. One archive with forty versions counts as forty archived pages. |
This chapter follows the lifecycle of an archive from creation through to automated ongoing capture. If you have not yet created your first archive, start here.
1. Creating An Archive
Creating an archive tells Pemarks to capture a web page and preserve it as a durable, verifiable record.
1.1. When To Create An Archive
Create an archive whenever you need a preserved copy of a web page. Common reasons include:
-
A page you may need to cite or reference later
-
Content you want to preserve before it changes or disappears
-
Evidence for an investigation, legal matter, or compliance review
-
The starting point for a version history that you will extend over time
-
A research source that you cannot afford to lose to link rot
1.2. Step-By-Step
-
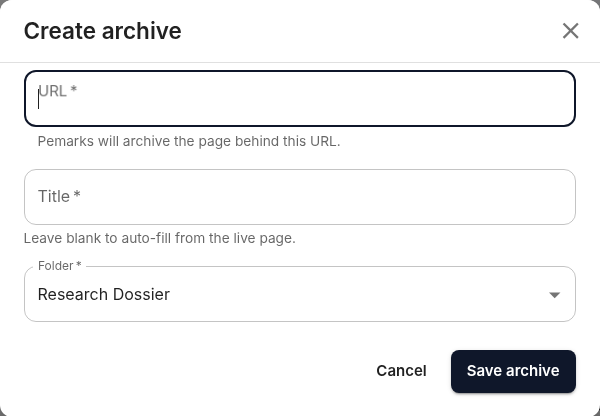
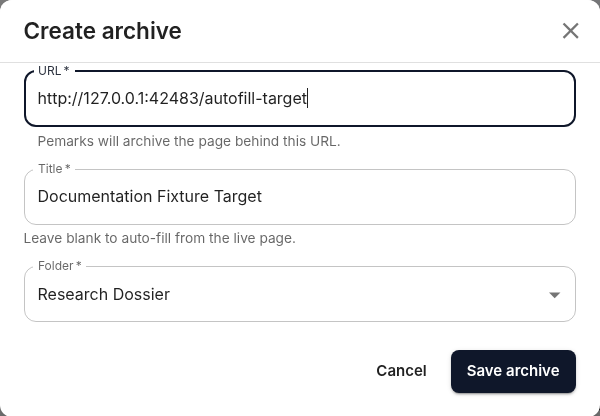
Choose New Archive from the dashboard or the archives workspace.
-
Enter the target URL.
-
Review the title that Pemarks proposes (it attempts to read the page title automatically) and adjust if needed.
-
Choose the destination folder.
-
Submit.
Once submitted, the archive appears immediately in your workspace. The archival pipeline begins in the background — Pemarks launches a browser, renders the page, captures resources, and builds the proof package. You do not need to keep the page open or wait for completion.
1.3. What Happens After Submission
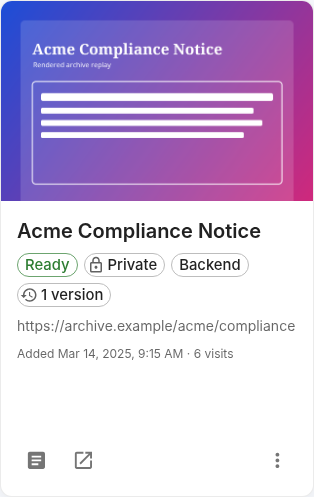
The archive goes through a series of states as Pemarks processes it:
- Loading
-
The browser is rendering the page and resources are being captured. The archive exists in your workspace but is not yet viewable.
- Screenshot ready
-
Pemarks has captured a screenshot of the rendered page. You can see the visual preview, but the full archive (with all resources, proof artifacts, and the extract report) is still being completed.
- Ready
-
The full archive package is complete. You can now open the archived copy, download artifacts, and access the extract report.
If something goes wrong:
- Not found
-
The target URL was not reachable. The site may be down, the URL may be wrong, or the server may have blocked the request.
- Archive error
-
The capture process encountered a problem — the page may have taken too long to render, resources may have been blocked, or a technical issue occurred.
- Cancelled
-
You (or the system) cancelled the capture before it completed.
|
An archive can exist in your workspace before the archived copy is ready. The screenshot may arrive before the full package. And quota is consumed by completed archived pages, not by the act of submitting the form. So feel free to create archives and let them process in the background. |
2. Viewing An Archive
Once an archive is ready, Pemarks gives you several ways to use it.
2.1. Open The Archived Copy
This opens the preserved Pemarks replay — the page as it was captured, with all resources served from the archive. This is the core output of Pemarks.
When you open the archived copy, look for the information banner (a small circular button in the top-left corner). Clicking it opens a panel where you can:
-
See when the page was archived and by whom
-
Check whether the archive is marked as guaranteed
-
View TLS and certificate details from the capture
-
Download the screenshot, PDF, extract report, HAR, and netlog
Use the archived copy when you need to:
-
Review the preserved state of the page
-
Quote or examine content as it was captured
-
Access the proof artifacts
-
Work with the preserved version rather than the changing live site
2.2. Open The Live Page
This opens the original URL in a new tab, showing whatever the site currently displays. This is useful when you need to:
-
Check what the source site shows right now
-
Compare the current state with your archived copy
-
Decide whether a fresh capture or new version is needed
-
Verify whether the source is still reachable
2.3. Open History
When an archive has multiple versions, the primary action becomes Open History because the next question is always "which version?" The history page shows all captured versions and lets you navigate between them.
As a rule of thumb: use the archived copy when you need the preserved state, use the live page when you need the current state, and use history when the timing of changes matters.
3. Editing An Archive
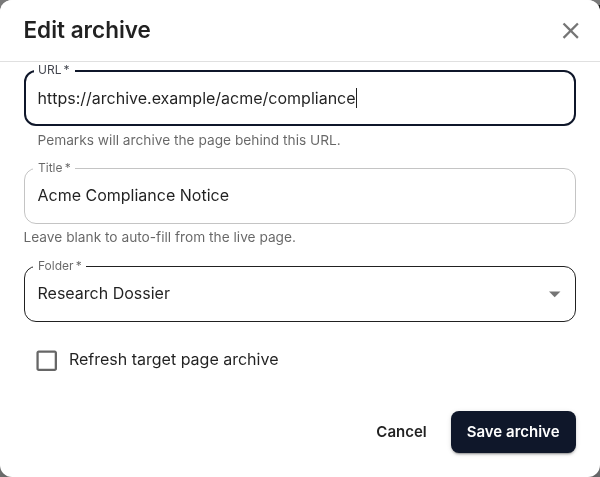
Editing changes the archive record — the metadata that describes the archive — not necessarily the preserved page content.
3.1. What You Can Change
-
Title: correct a label without affecting the archived page
-
URL: point the archive at a different address
-
Folder: move the archive to a different folder for better organization
-
Refresh the archive: ask Pemarks to re-capture the page and replace the current archived copy
3.2. The Difference Between Editing And Refreshing
If you only change the title, URL, or folder, you are reorganizing the archive record. The archived page itself remains untouched.
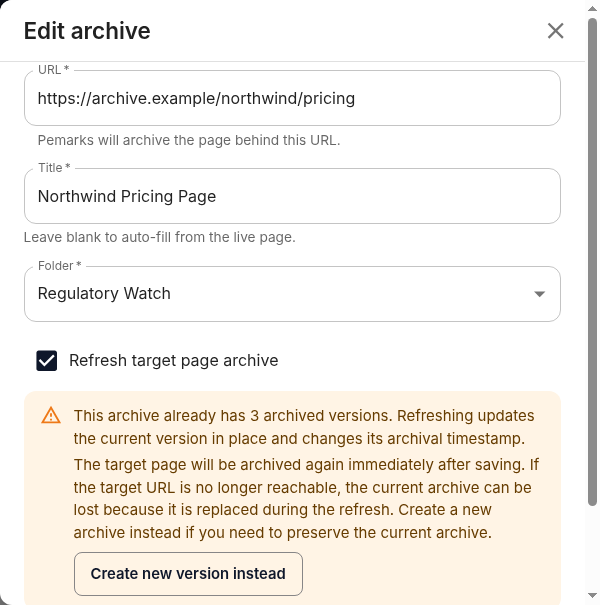
If you check Refresh target page archive (while keeping the same URL), you are asking Pemarks to replace the current archived copy with a fresh capture. The previous state is overwritten.
This is an important distinction. If you want to keep the current archived state and capture the page again, do not use refresh. Instead, create a new version (explained later in this chapter).
3.3. When To Edit
-
The title needs correction
-
The archive belongs in a different folder
-
The URL changed and the archive should point to the new address
-
You intentionally want to replace the current archive with a fresh capture and do not need to preserve the previous state
4. Deleting An Archive
Deletion is a destructive action. It removes the archive entry and its associated archived pages from your workspace.
4.1. When To Delete
-
The archive was created by mistake
-
The target is no longer relevant to your work
-
You want to reclaim quota by removing archives you no longer need
4.2. When Not To Delete
If your goal is to reduce the depth of a version history without removing the archive entirely, use Delete old versions instead. That keeps the most recent archived state while trimming earlier captures.
As a working rule:
-
Delete the archive when the entire item should disappear from your workspace
-
Delete old versions when the archive should survive but the historical stack should be reduced
5. Refresh Versus New Version: A Critical Distinction
This is one of the most important concepts in Pemarks. Refresh and new version are not the same action, and choosing the wrong one can result in lost evidence.
5.1. Refresh (In-Place Update)
A refresh re-captures the page and replaces the current archived copy. The previous state is gone.
Use refresh when:
-
You only care about the latest state of the page
-
Replacing the current archive is acceptable
-
You do not need a before-and-after comparison
-
The archive is a reference, not evidence of change
5.2. New Version (Historical Capture)
A new version re-captures the page and adds the new capture alongside the existing one. Both states are preserved.
Use new version when:
-
Timing matters — you need to know what the page showed on different dates
-
You may later need to compare one capture with another
-
You want the current archived state to remain available while also capturing the new state
-
The archive is part of an ongoing monitoring effort
-
The page is evidence and any change in it is significant
If your archive already has a version history and you try to refresh, Pemarks warns you that the refresh will affect the active version rather than adding a new historical entry. Pay attention to that warning.
5.3. Real-World Example
Suppose you are monitoring a competitor’s pricing page. You archived it last month. Today you want to see if the prices changed.
-
If you use refresh, you get today’s version, but last month’s prices are gone from your archive. You can no longer prove what they were.
-
If you create a new version, you keep both: last month’s archive and today’s archive. You can compare them side by side and use both as evidence.
When in doubt, create a new version. You can always delete old versions later, but you cannot recover an overwritten archive.
6. Multi-Version Pages (Version History)
|
Version history requires Field Notes or above. Public Record users keep the single-version behavior. |
Version history is where Pemarks moves beyond simple archival and into change evidence. Instead of one snapshot, you build a dated record of how a page evolves over time.
6.1. How It Works
-
Each archive has a logical identity (a lineage). All versions of the same page share this identity.
-
The latest version is the default when you open the archived copy.
-
Older versions remain accessible through the history page.
-
The version count is visible on the archive card and drives whether the archive is treated as historized.
6.2. Creating A New Version
You can start a new version from:
-
The archive actions menu in the workspace (New Version)
-
The New Version button on the history page
The workflow is:
-
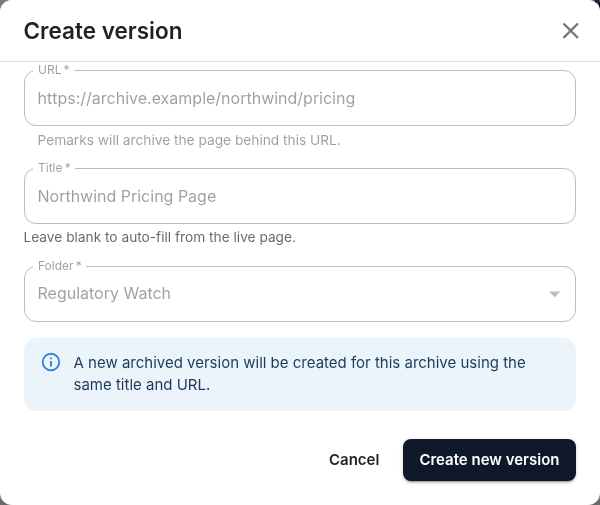
Start New Version.
-
Pemarks reuses the existing title, URL, and folder as defaults.
-
Submit the capture.
-
Wait for Pemarks to archive the new state.
-
Return to the history page to see the new entry.
Pemarks enforces lineage consistency:
-
Same title and URL on an eligible paid plan: new version is created
-
Same title and URL on the free plan: rejected as a duplicate
-
Same title but different URL: rejected to prevent mixing unrelated targets into one history
7. Working With Version History
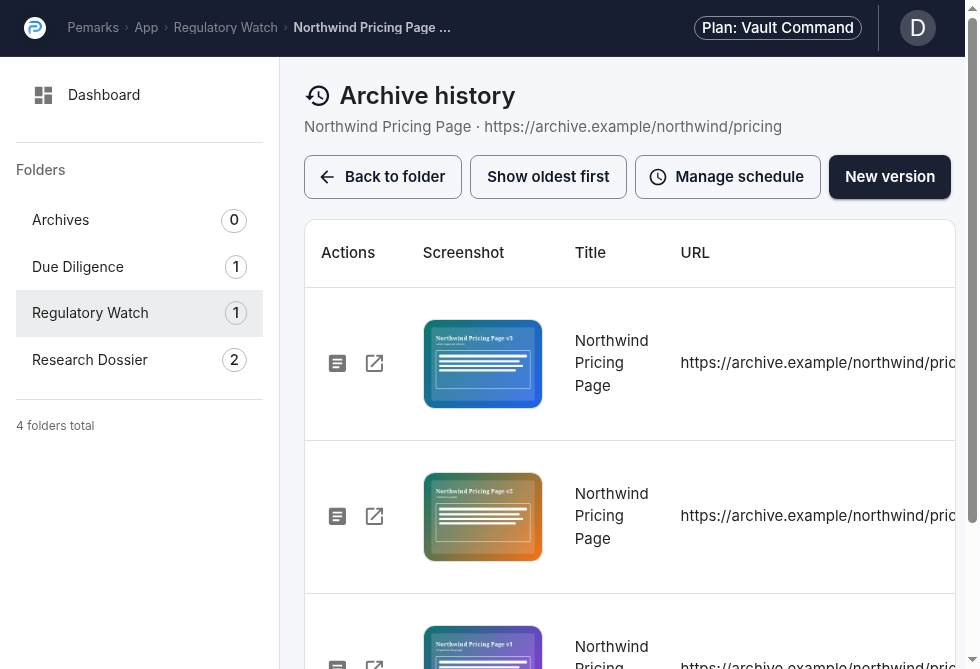
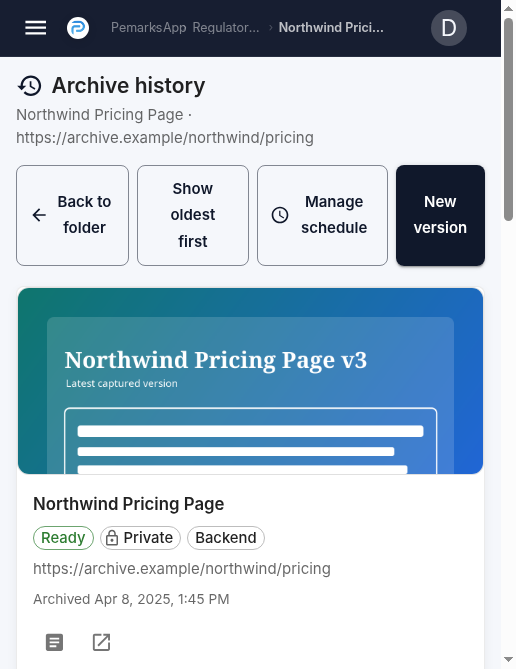
The history page is the operational center for any archive that has evolved over time.
7.1. What You Can Do On The History Page
-
Sort versions by newest-first or oldest-first, depending on what you are looking for
-
Open the archived replay for any specific version — see exactly what the page showed on that date
-
Open the live page to compare with the current state
-
Create another version to extend the record
-
Edit one version without affecting the others
-
Share one version publicly while keeping the rest private
-
Delete one version when it is no longer needed
-
Navigate back to the folder workspace
7.2. Typical Workflow
-
Open history from the archive card.
-
Sort by date depending on your question — recent-first to check the latest state, oldest-first to find the earliest record.
-
Open the specific version you need.
-
Compare it with other versions or with the live page.
-
Edit, share, or delete individual versions as needed.
-
Create a new version when you need to extend the historical record.
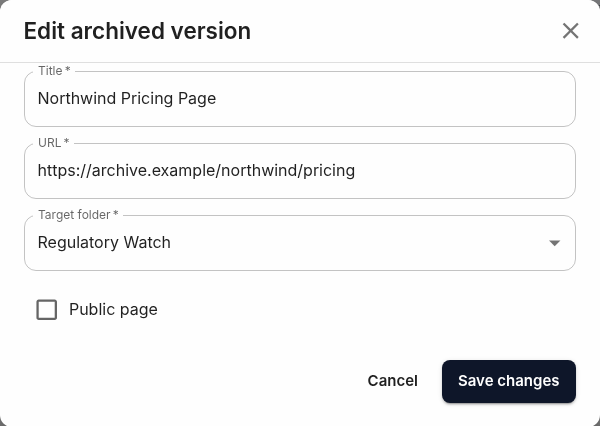
8. Editing A Specific Version
Version-level editing lets you change one historical snapshot without affecting the rest of the lineage.
You can change:
-
The displayed title
-
The associated URL
-
The target folder
-
The public/private visibility of that specific version
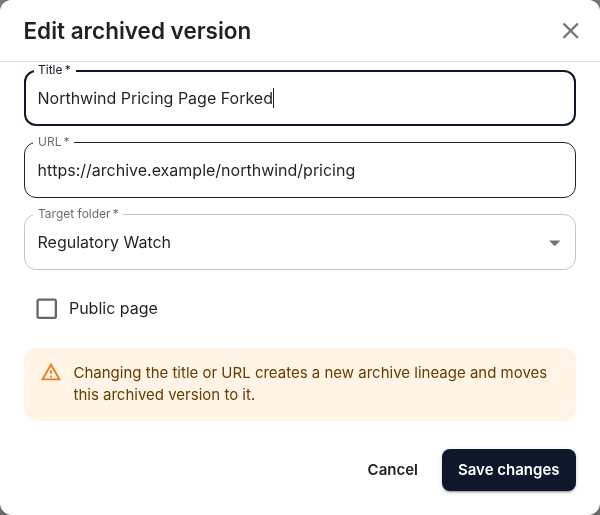
|
If you change the title or URL of a version, Pemarks warns you that the version will split into a separate lineage. This is intentional: a version history should track one logical target, not mix unrelated pages together. If you proceed, the edited version becomes the seed of a new, independent archive history. |
Use version editing when a correction or publication decision applies to one specific point in time rather than to the archive as a whole.
9. Making An Archive Or Version Public
|
Public archive sharing requires Field Notes or above. Public Record users can only keep private archives. |
Public sharing lets you make an archived page accessible to anyone with the link, without requiring them to have a Pemarks account.
9.1. Key Things To Understand
- Visibility is version-aware.
-
One version can be public while another version of the same archive remains private. Making one version public does not affect the others.
- Public URLs are secured.
-
Public resource URLs are signed and bound to the specific resource, page, version, and an expiry time. This prevents someone from reusing a public link to access different versions or resources.
- Sharing is reversible.
-
You can revoke public access at any time by switching the version back to private. The underlying archive is not deleted — only external accessibility changes.
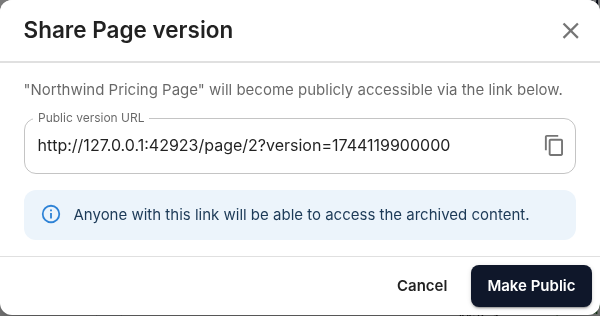
9.2. Making The Latest Archive Public
-
Open the archive actions menu.
-
Choose Share….
-
Review the generated public URL.
-
Confirm to make the page public.
-
Copy and distribute the link.
9.3. Making One Specific Version Public
-
Open the archive history.
-
Find the exact version.
-
Choose Share… on that version.
-
Confirm to make only that version public.
This is the right approach when one dated snapshot should be shared but the rest of the history should remain private — for example, sharing a specific date’s capture as evidence while keeping earlier and later versions restricted.
10. Cleaning Up Version History
Over time, a version history can grow large. Pemarks provides two cleanup workflows because they solve different problems.
10.1. Delete Old Versions
Delete old versions keeps the most recent archived state and removes all earlier ones. Use this when:
-
You want to reduce the depth of the history
-
The current archive is the only one that matters
-
You need to reclaim quota without removing the archive entirely
10.2. Delete One Specific Version
Deleting one version from the history page is more surgical. Use this when:
-
One particular archived version is wrong, irrelevant, or no longer needed
-
The rest of the history should remain intact
-
You need to curate the historical record rather than collapse it
|
Even on the free plan, if an archive already has multiple versions (for example, because the account was previously on a paid plan), Pemarks still allows the cleanup path that deletes older versions and keeps only the latest one. |
11. Auto-Archive Scheduling
|
Auto-archive requires Casefile or Vault Command. It is not available on Public Record or Field Notes. |
Auto-archive builds on version history. Each scheduled execution creates a new version of the target archive, building a dated record of changes over time without manual intervention.
11.1. When To Use Auto-Archive
Auto-archive is designed for pages that:
-
Change regularly and those changes matter to you (competitor pricing, regulatory filings, terms of service)
-
Need to be preserved on a fixed schedule for compliance reasons
-
Are part of an ongoing monitoring effort where manual capture would be impractical
-
Warrant the quota consumption that comes with repeated archival
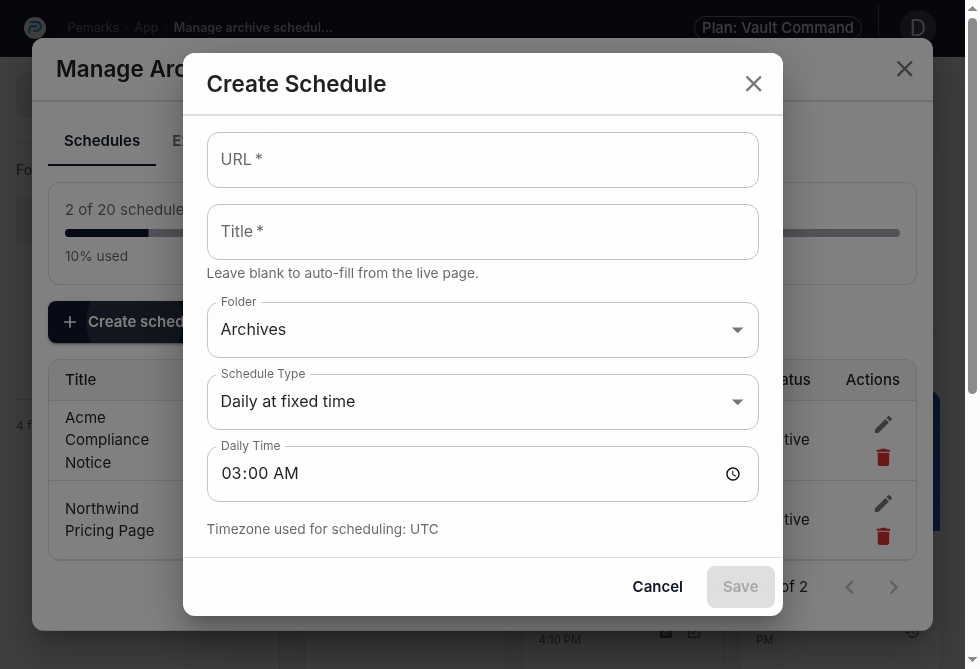
11.2. Creating A Schedule
You can create a schedule from:
-
The Manage Archive Schedules option in the user menu (for general schedule management)
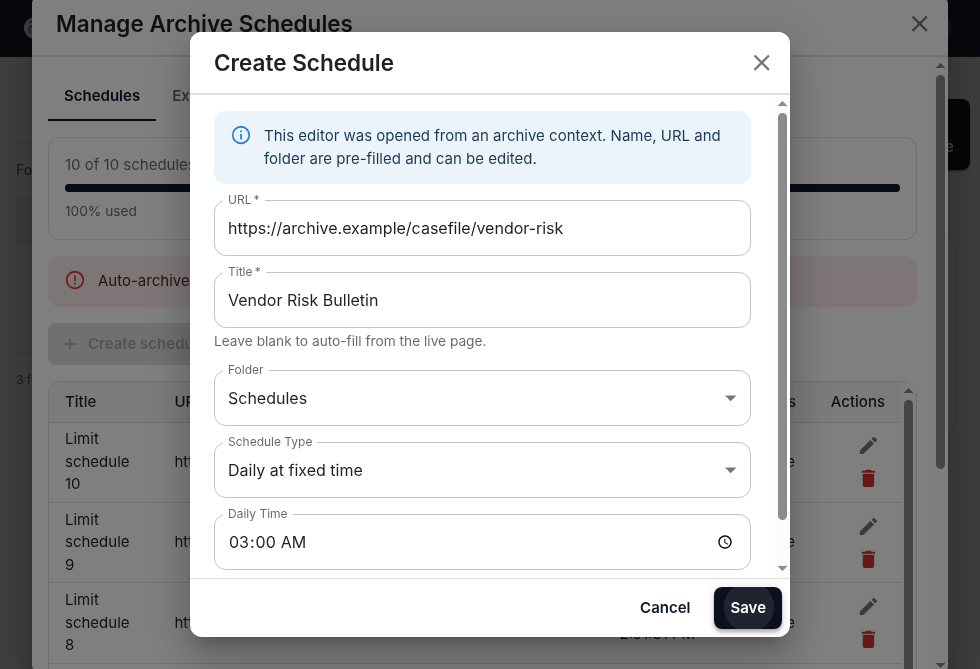
-
An archive’s actions menu (the title, URL, and folder are pre-filled)
-
The history page of an existing archive (also pre-filled)
Starting from an existing archive is usually the most reliable approach because it reduces the chance of mismatched titles or URLs.
The schedule configuration includes:
- Schedule type
-
Choose between daily at a fixed time or periodic interval-based scheduling, depending on whether you need captures at a consistent clock time or at regular intervals.
- Timezone
-
Defaults to the timezone captured from your browser at login. Make sure this is correct, especially if you are working across time zones.
12. Managing Schedules
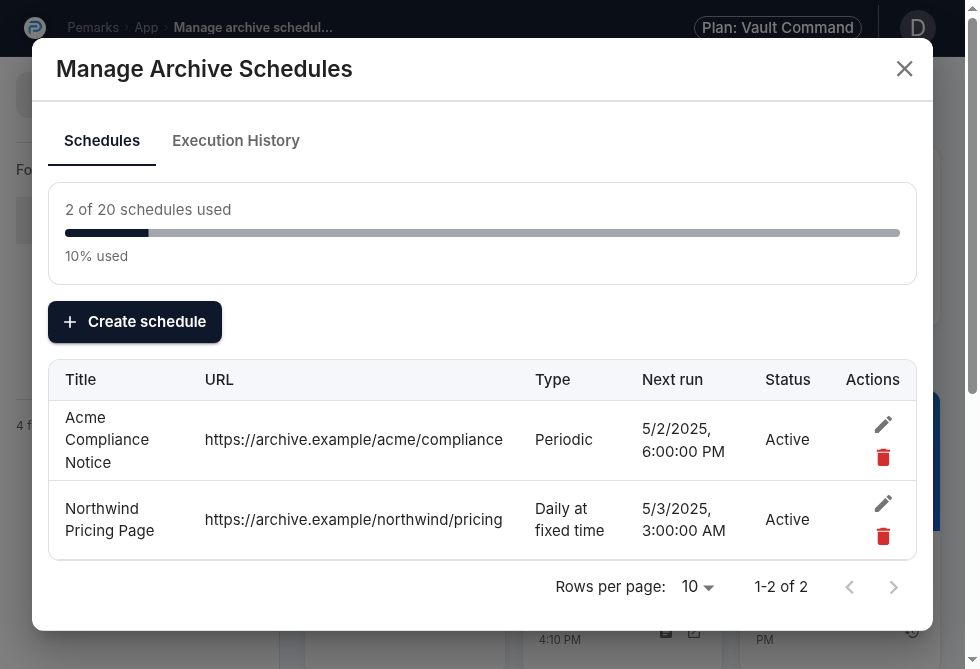
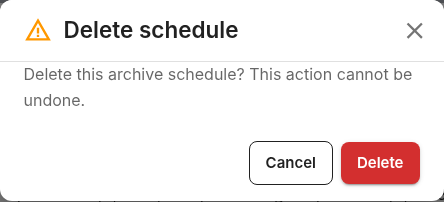
The schedule management dialog lets you:
-
Review all your active schedules
-
Edit a schedule to change its timing
-
Delete a schedule to stop future captures
-
Jump from a schedule to its associated archive
Important: deleting a schedule stops future captures, but it does not delete the versions that were already archived. Past captures remain in your archive history.
13. Viewing Execution History
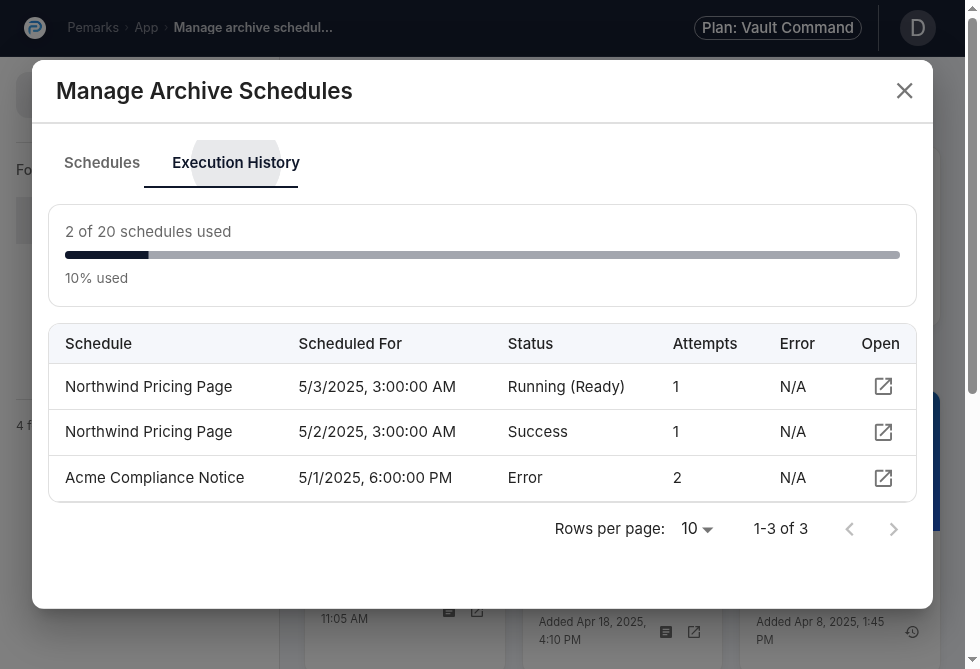
Each schedule has an execution history that shows what happened on each run. This helps you distinguish between "the schedule exists" and "the schedule is actually succeeding."
Each execution progresses through:
-
New — the execution slot was created
-
Pending — the execution is waiting to be picked up
-
Running — the capture is in progress
-
Terminal state — either Success (archive created), Error (something went wrong on this run), or Failed (the execution could not complete after retries)
If a schedule has repeated consecutive errors, Pemarks may automatically stop it to prevent an endlessly failing schedule from consuming resources without producing useful results. Check the execution history to understand what went wrong and whether the schedule should be restarted.
14. Plan Limitations And Upgrade Messages
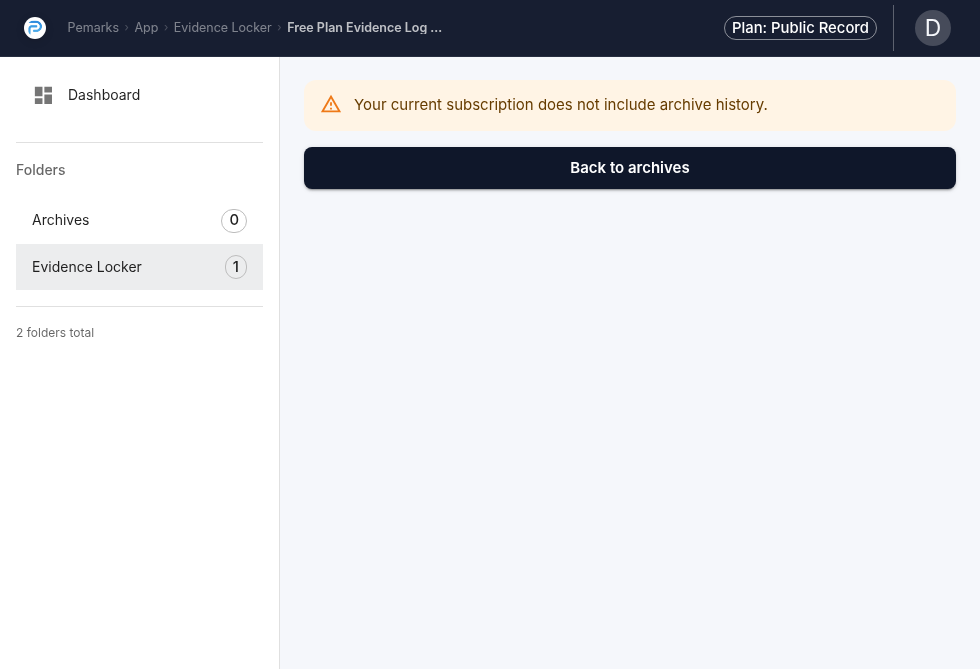
Pemarks does not silently hide features that require a higher plan. Instead, it shows clear messages explaining what is blocked and why. You may encounter:
-
A message that version history is not available on the free plan
-
A message that auto-archive requires Casefile or above
-
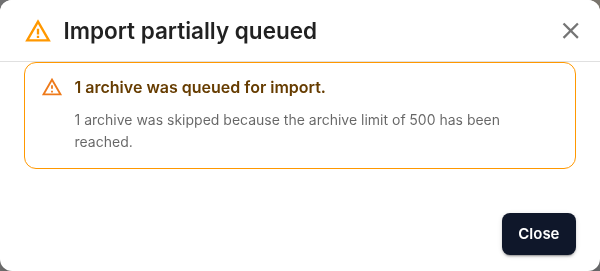
A message that import requires Casefile or above
These messages are designed to help you understand what your current plan includes and what an upgrade would unlock. They appear at the point where you try to use the feature, not as generic marketing popups.
15. Best Practices
15.1. For Single Archives
-
Use a single archive without versions when you only need one preserved state of a page
-
Use refresh only when replacing the current archive is acceptable and you do not need the previous state
-
Check the archive status before relying on it — make sure it shows as ready, not still loading or in error
15.2. For Version Histories
-
Create a new version instead of refreshing whenever the previous state has any potential value
-
Make visibility decisions per version, not by assumption across the whole history
-
Clean up old versions periodically to manage quota, but err on the side of keeping versions that might matter later
15.3. For Auto-Archive
-
Only schedule captures for pages that truly warrant repeated archival
-
Monitor execution history periodically to catch failures early
-
Remember that each scheduled capture consumes one archived page of quota
-
Start with longer intervals and increase frequency only if the page changes often enough to justify it
15.4. General
-
Organize folders before large import or archival sessions
-
Set your default folder to match your current active project
-
Track quota in terms of total archived pages (including versions), not just the number of archive entries
-
When in doubt between refresh and new version, choose new version. You can always clean up later, but you cannot recover an overwritten archive.
The next chapter explains what Pemarks transforms during capture, what the proof artifacts contain, and how to validate an archive after the fact.